Lab 12 Export Tech Support and Audit Logs
Overview
While ACI is now a mature technology, there are occasions when you will need to contact Cisco TAC for support. Its always a good idea to have your current configuration documented and ACI makes that very simple.
In Lab 07, we configured a remote location for daily backups and off-fabric snapshots. Feel free to use that remote location for this lab or if you want to practice create a new FTP server to export what is the equivalent of show tech.
Lab Goals
Collect and export on-demand Tech Support
Step 1 - Configure a remote location for the FTP service on your Student PC
Step 2 - Review the two types of Tech Support export policies available eon the APIC
Step 3 - Verify there are no files in the FTP root directory on your Student PC
Step 4 - Enable the FTP Server on StudentPC
Step 5 - Enable the Tech Support export
Step 6 - Collect Tech Support Report
Step 7 - Check Export status
Query and Save Audit logs
Step 1 - SSH to APIC
Step 2 - Redirect Output to a Text File
Step 3 - View the saved log
Collect and export on-demand Tech Support
Generate and export on demand tech support data.
Tip: Make sure the account on your FTP server can upload and create directories.
Step 1 - Configure a remote location for the FTP service on your Student PC for TechSupport Export
Navigate to Admin > Import/Export > Remote Locations. Right click on the Remote Locations folder icon and select Create Remote Location.
Note: You will see some other remote locations that are used for loading the Cisco APIC configurations.
Configure the properties of the Remote location.
Remote Location Configuration Settings Table
| Field | Value |
|---|---|
| Name: | Remote_TechSupportExports |
| IP Address: | 192.168.10.15 |
| Protocol: | ftp |
| Credentials: | admin/1234QWer |
| Access: | out-of-band |
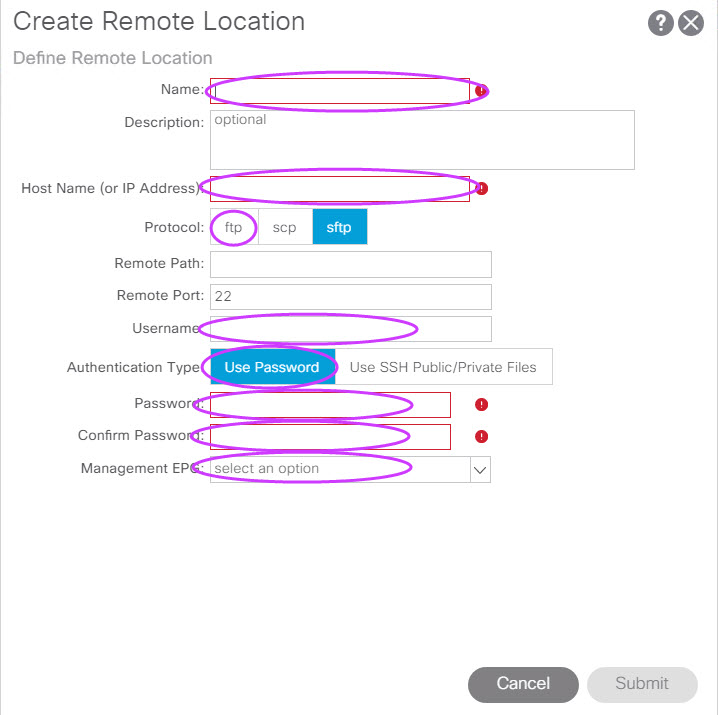
Keep all other fields at their default values.
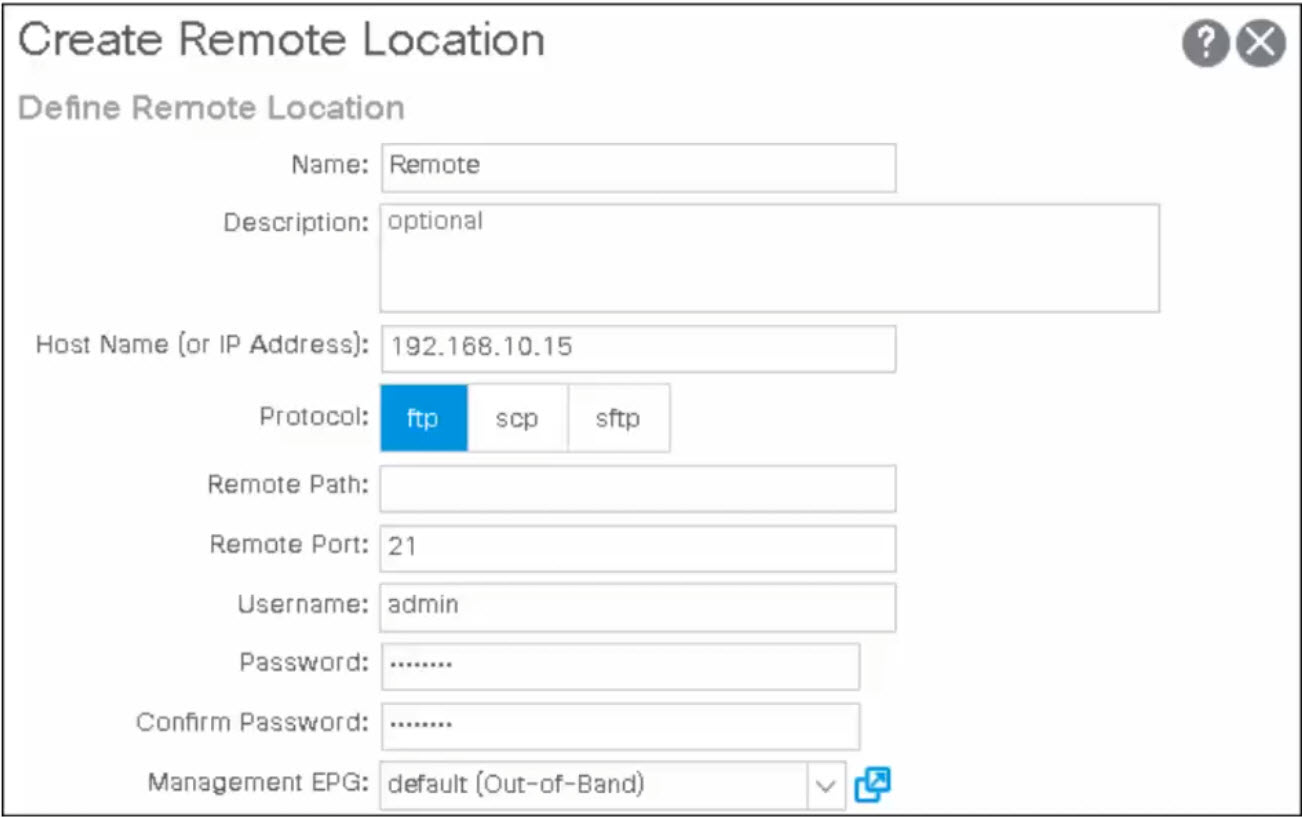
Click Submit
Step 2 - Review the two types of Tech Suport export policies available eon the APIC
Navigate to Admin > Import/Export > Export Policies. Expand the Tech Support and On-Demand Tech Support menus. You should see a policy default for each type. You should also see additional menus for specialized Tech Support data.
Tech Support allows you to schedule an export periodically.
On-demand Tech Support, as you would expect, allows you to export on-demand.
Step 3 - Verify there are no files in the FTP root directory on your Student PC
View the contents of the C:\ACI folder to confirm there are no files.
Step 4 - Enable the FTP Server on StudentPC
Start the 3CDaemon application on your StudentPC. This will enable the FTP server.
Step 5 - Enable the Tech Support export
Configure the On-demand Tech Support default policy to use the remote location defined in Step 1 and include information from all fabric nodes by leaving the Category check box checked (the default value) for All nodes.
Click Submit
Step 6 - Collect Tech Support Report
Click the tools symbol in the top-right corner, choose Collect Tech Supports and then click Yes to confirm thee action
Step 7 - Check Export Status
Click on the Operational tab in the main panel to monitor export status. After a few minutes, the Detail STatus should start changing from "Collecting tech support form nxos" to "Preparing the compress logs and export". Once the status shows a check mark and the Detailed Status is "Task Completed" its time to verity the export
Step 8 Verify TechSupport Export on StudentPC
On your StudentPC, check the contents of the C:\ACI folder. It should contain a sub-directory (tsod-default) with the compressed exported gzipped tar files
Query and Save Audit logs
Cisco ACI fabric accounting is handled by the same mechanism that handles faults and evens. These two managed objects (MO) represent fabric accounting:
aaaSessionLR
- This managed object tracks user account sessions (login/logout) on the APIC and switches
aaaModLR
- This managed object tracks the changes made by users to objects. If the AAA server is not pingable, it is marked as unavailable and a fault is seen.
- Both of these event logs are stored in the APIC shards. Once the data exceeds the pre-set storage allocation size, it overwrites records on a first-in first-out basis
The standard syslog, callhome, REST query, and CLI export mechanism are fully supported for queries to these two MOs , however, there is no default policy to export this data.
For this the moquery CLI command must be used.
Step 1 - SSH to APIC
Launch PUTTY from your StudentPC Desktop and connect to your Cisco APIC with the usual credentials. Use the moquery utility to display the aaaModLR audit logs (all objects of the class aaaModLR). The process of retrieving and outputting will take several minutes so you may terminate the PUTTY window with Ctrl+C.
apic1#moquery -c aaaModLR
apic1#moquery -c aaaSessionLR
Step 2 - Redirect Output to a Text File
Redirect the audit log output to a text file (/tmp/AuditLogMod.txt). It will take a few minutes to complete.
apic1# moquery -c aaaSessionLR > /tmp/AuditLogSession.txt &
[1] 29187
apic1# moquery -c aaaModLR > /tmp/AuditLogMod.txt &
[2] 29605
apic1#
[1]  - done       _exec_legacy_cmd "/controller/bin/moquery" "$@" -c aaaSessionLR >
apic1#
[2]  + done       _exec_legacy_cmd "/controller/bin/moquery" "$@" -c aaaModLR >
apic1#
Note: including the ampersand (&) at the end of the command allows the process to run in the background so you can continue to use the shell.
Once the background processes are "done", you can check the size of the files
apic1# ls -al /tmp/*.txt
-rw-r--r-- 1 admin admin 411981 Aug 14 21:35 /tmp/AuditLogMod.txt
-rw-r--r-- 1 admin admin 410710 Aug 14 21:35 /tmp/AuditLogSession.txt
-rw-r--r-- 1 root  root    2020 Aug 14 21:44 /tmp/standby-av-fixup-output.txt
apic1#
Step 3 - View the saved log
In approximately 8 minutes you can view the audit log. Normally, once the output is complete you would copy the file off the APIC to view.
Command and example output
apic1# more /tmp/AuditLogSession.txt
Total Objects shown: 703

# aaa.SessionLR
id           : 4294967969
affected     : uni/userext/user-admin
cause        : unknown
changeSet    :
childAction  :
clientTag    :
code         : generic
created      : 2020-08-14T18:40:49.634+00:00
descr        : From-192.168.10.40-client-type-REST-Success
dn           : subj-[uni/userext/user-admin]/sess-4294967969
ind          : special
modTs        : never
rn           : sess-4294967969
sessionId    : roRTGvO5SbiiorzyJcFT4w==
severity     : info
status       :
systemId     : 1
trig         : refresh,session
txId         : 0
user         : admin
--More--(0%)